





A cabinet door that looks straight after adjustment but drops again after several openings usually has a fastening, wear, or loading problem—not simply an incorrect screw setting. The changing gap can make the door rub against its neighbor, catch the cabinet edge, or close unevenly. Start by finding which part moves: the mounting plate, the hinge cup, the hinge arm, or the cabinet itself.
If you are asking, “How do I fix a concealed hinge that will not stay aligned?” the most reliable approach is to restore a solid attachment first, replace worn or incompatible hardware when necessary, and then adjust the door. Repeatedly turning the adjustment screws cannot compensate for stripped holes, a loose clip connection, or a door that exceeds the hinge arrangement’s capacity.
Find the movement before changing the settings
Empty any door-mounted storage and support the door while inspecting it. For a tall, heavy, or glass-fronted door, use a helper rather than relying on one hinge while loosening the other. Have a correctly fitting screwdriver, flashlight, straightedge, and pencil ready. A hand screwdriver gives better feedback than a powered driver when checking small hardware screws.
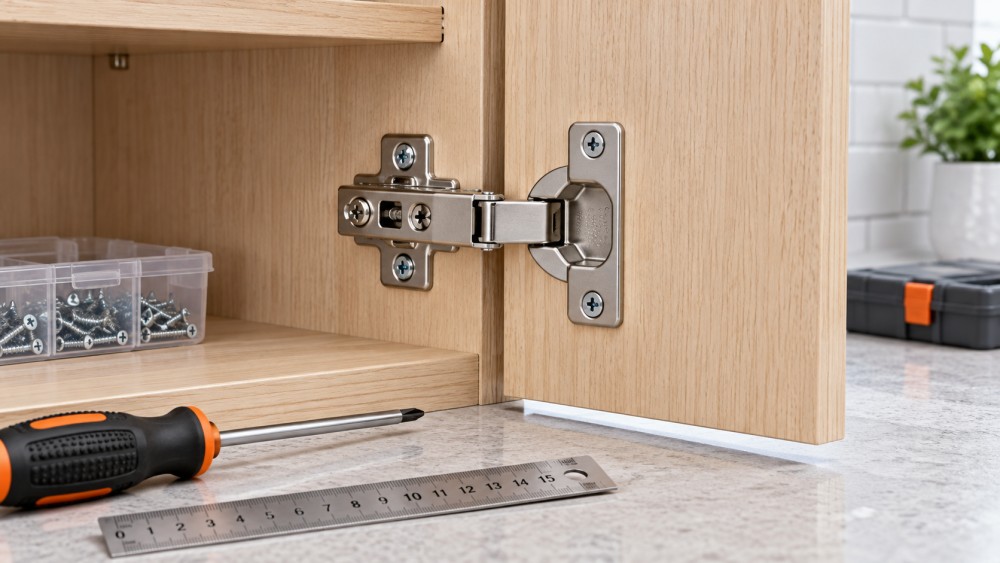
Open the door and gently lift its outer edge while watching each hinge connection. A small amount of elastic movement is not automatically a fault; look for one component slipping relative to another. Do not pull hard enough to bend the hinge or tear its screws out.
- The mounting plate shifts against the cabinet: its fixing screws may be loose, the holes may be damaged, or the panel beneath it may be deteriorating.
- The cup moves inside the door: inspect its retaining screws, dowels, or expansion fittings and the material around the cup recess.
- The arm moves relative to the plate: check the clip latch or arm-retaining connection specified for that hinge.
- The joints move while the plate and cup remain fixed: worn pivots, a bent arm, or internal damage may be responsible.
- The entire cabinet side moves: the hinge is attached to an unstable structure; cabinet repair comes before alignment.
Also note when the misalignment appears. Immediate sagging when support is removed suggests attachment movement, joint play, or inadequate support. Drift after repeated opening points toward slipping connections or adjustment mechanisms. A gap that changes without opening the door may involve cabinet movement, moisture-related panel changes, or door distortion.
Adjustment, attachment repair, or replacement?
These fixes address different faults. Choosing by the visible symptom alone—such as a dropped handle-side corner—can lead to unnecessary hinge replacement or repeated adjustments that never hold.
Restore the fixing points without damaging the panel
Loose screws that still hold
Support the door, seat the mounting plate or cup correctly, and tighten its fixing screws with the appropriate driver. Stop once the fitting is clamped firmly. Excess force can strip particleboard, crush the surface around a plate, or damage screw heads. Check every attachment: one loose lower hinge can allow a door to rotate even when the upper hinge appears secure.
Some cups use expansion dowels, press-in fittings, or tool-free locking mechanisms rather than ordinary wood screws. Identify the fitting before working on it. Treating an expansion fixing like a conventional screw can damage both the fixing and its bore.
Stripped holes: repair depends on the material
A screw that spins without tightening has lost its grip. A longer or wider screw is not an automatic solution: the door or cabinet side may be too thin, and a different screw head may not seat properly in the hardware. Confirm the available depth, hole position, and required fastener type before changing screws.
In sound solid wood, a properly fitted wood plug bonded with a suitable wood adhesive, allowed to cure, and redrilled with an appropriate pilot hole can restore a fixing point. Maintain the original hole location so the repair does not introduce a new alignment problem. Loose slivers stuffed into a heavily loaded hole are less predictable than a fitted repair.
Particleboard and MDF need greater caution. Surface crumbling, enlarged holes, or a fractured cup recess may call for a compatible hinge repair plate or a designed insert system. The repair must transfer load into sound material, not merely cover the damaged spot. Follow the repair component’s drilling and fastening instructions.
Check clearance before fitting a reinforcement plate. Added thickness can alter mounting geometry, restrict adjustment, or interfere with the hinge arm. Extensive swelling, delamination, or damage close to a panel edge may leave insufficient material for a secure local repair. In that situation, repairing or replacing the affected panel is more dependable than installing larger screws.
Make controlled adjustments after everything is secure
Concealed hinges commonly provide side-to-side, height, and depth adjustment, but the screw functions vary. Some height settings require loosening plate screws; others use a dedicated cam. Depth may be controlled by a cam or by a sliding connection. Consult the hinge instructions rather than assuming every visible screw is an adjuster.
- Record the starting position. Photograph the fittings and note where the gaps are narrow or wide. Discreet pencil marks beside a plate can help reveal later movement.
- Establish door height. Support the door and adjust its vertical position using the specified mechanism. Retighten any locking screws before releasing the support.
- Set lateral alignment. Use small side-adjustment movements to establish the reveal or overlay. Correct a tilted gap with coordinated changes at the hinges rather than forcing one hinge to its limit.
- Set depth. Bring the door into the intended closed position without pressing it excessively against the cabinet, seals, or bumpers.
- Recheck the gaps and fasteners. Close the door gently between changes. Adjustment on one axis may affect another, particularly on multi-hinge doors.
Forcing the door into position while tightening can preload the hinges. The door may appear aligned under hand pressure, then move when released. Let it rest naturally during each check, with support used only to prevent uncontrolled sagging.
Do not use an impact driver on adjustment mechanisms or turn a cam past its designed travel. If a setting changes again while the mounting plate and cup remain stationary, inspect the adjuster itself. A damaged cam, worn thread, or failed retaining mechanism usually calls for replacement rather than additional tightening.
When a new hinge is the better repair
Replacement is justified when there is persistent pivot play, visible bending, cracking, a failed latch, or an adjustment mechanism that cannot retain its position. A soft-close damper failure alone does not necessarily explain alignment drift. Distinguish loss of damping from looseness in the load-bearing joints.
A matching cup diameter is only the beginning of compatibility. The replacement also needs the correct overlay, half-overlay, or inset configuration; suitable arm geometry; opening angle; cup depth; fixing pattern; and mounting plate relationship. A hinge that fits the recess can still place the door incorrectly or bind during opening.
Record markings and measure the existing installation before ordering. Check whether the manufacturer permits the replacement hinge to work with the existing plate. Similar-looking clip-on interfaces are not necessarily interchangeable. Where wear affects several hinges, replacing a compatible set can avoid leaving one loose joint in an otherwise repaired installation.
Adding hinges is a different decision from replacing worn ones. Tall, wide, thick, or heavy doors may need a different quantity or placement of hinges, but capacity depends on the complete application—not a universal weight-per-hinge figure. Use the manufacturer’s door-size and weight guidance, including placement requirements. Additional hinges must share a consistent mounting line; inaccurate drilling can introduce binding rather than useful support.
Problems that look like hinge drift but are not
A cabinet that is racked or poorly secured can produce uneven gaps even with functioning hardware. Check its opening with a straightedge and compare the diagonals where practical. Inspect loose cabinet joints and movement at the installation points. Correct structural movement before using hinge adjustment to disguise it.
A twisted door may sit flush at one corner and stand proud at another. Trying to pull it flat through opposing depth adjustments places unnecessary stress on the hinges and fixings. Check the door’s flatness separately from its hanging position.
Closing resistance is another clue. A misplaced bumper, latch, or obstructing shelf can push the door away from its intended position. Excessive depth adjustment may also make the hinge-side edge contact the cabinet before the door closes. Repeatedly forcing it shut loads the attachments and can make a sound repair fail.
Verify that the repair holds
After repair and adjustment, remove the support and open and close the door repeatedly through its normal working range. Watch the plate, cup, and arm connection rather than judging only the final gap. Check for rubbing, latch interference, and binding near the end of travel. Restore any door-mounted contents only within the installation’s intended loading limits.
Inspect again after normal use. Movement against a pencil reference mark points back to an attachment problem. Stable mountings with renewed door-edge sag suggest hinge play or inadequate support. Stable hardware with a changing cabinet opening directs attention to the cabinet structure.
A repaired hinge should retain its setting without being driven to the end of its adjustment range. Where the gap is correct only at an extreme setting, verify the plate height, overlay specification, and drilling positions before accepting the result. Otherwise, the installation may have little usable adjustment left for future settling.
Related News
- 00
0000-00
How to prevent delamination in laminated flexible packaging films - 00
0000-00
Fujifilm and ePac Partner Globally on Jet Press FP790 Deployment - 00
0000-00
Choosing technical ceramics for wear resistance under impact loads - 00
0000-00
Which compliance standards apply to children's stationery in the US? - 00
0000-00
How to assess a furniture components supplier’s production capacity
Weekly Insights
Stay ahead with our curated technology reports delivered every Monday.